

Hello, Quilters! I'm so excited that fall is here! That means warm drinks, cozy sweaters, and more time quilting. But for now, the garden still has most of my attention.
Last year we threw little decorative pumpkins in the garden after we were done with them. To our surprise, a few of the seeds grew. Now we have plenty to decorate with this year and some to share.
As I was looking for ideas to use them, I came across a painted and stenciled Barn Quilt Pumpkin. A Barn Quilt is a quilt block painted on a board and hung on a barn. Making a barn quilt has been on my to-do list for years but I've never gotten around to it. A tiny version painted on a small pumpkin seemed doable.
I quickly learned stenciling on a curved surface is very difficult. I painted over it and looked for another way to get the same look.
Mod Podge transfer was my answer. It was much easier for my shakey hands to handle. You just coat the design with Mod Podge, place it on your pumpkin, and let it dry. Then carefully rub off the paper and your design stays on the pumpkin!
There are times in life when something looks impossible, like me stenciling on a pumpkin. But God is our helper and he always has a way. Ask Him because He cares about every little (and big) thing in your life.
Isaiah 41:10, ESV Fear not, for I am with you; be not dismayed, for I am your God; I will strengthen you, I will help you, I will uphold you with my righteous right hand.
These cute pumpkins make a great addition to a quilter's fall decorations. They would be adorable in your sewing room, on a mantle, or on a side table next to a chair with a quilt tossed over. They also would make a great gift for a fellow quilter.
Are you ready to make your own Barn Quilt Pumpkin? Here's how I did it.
Supplies needed:
- pumpkins or gourds, cleaned and dried
- fine sandpaper
- white paint (I used some chalk paint I had left from another project)
- paintbrush
- Mod Podge
- Foam brush
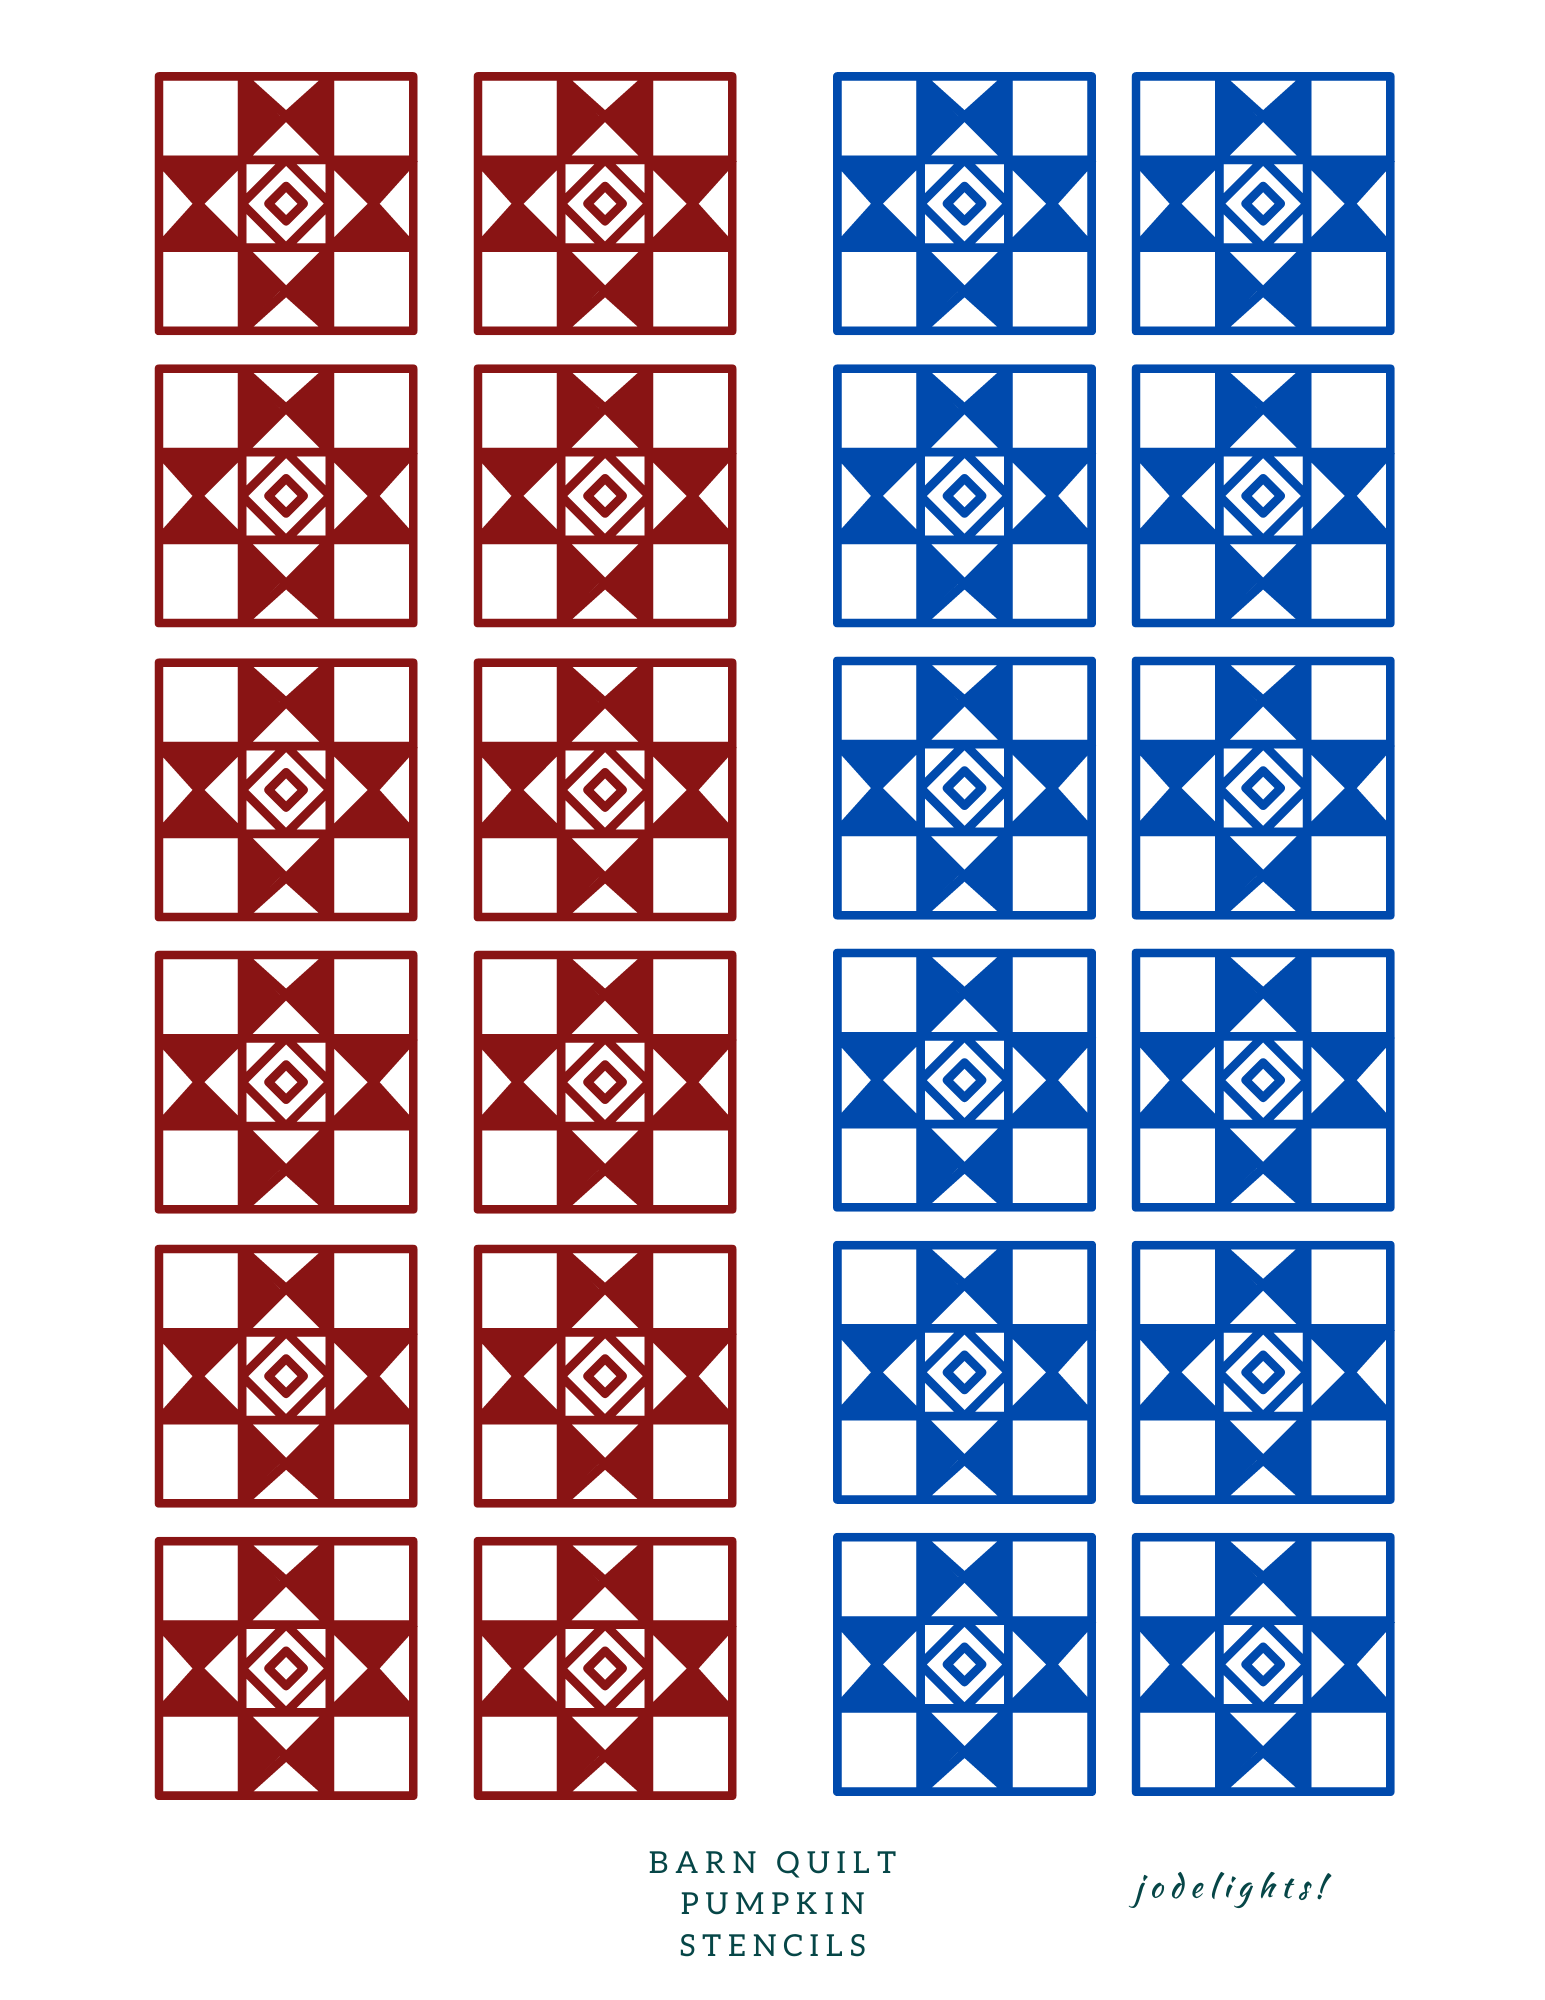
- printed design (use a dry toner printer) You'll find the one I used at the end of this blog. You may print it for your own use, or use another design.
- scissors
- sponge
- sealer (again, I used what I had)
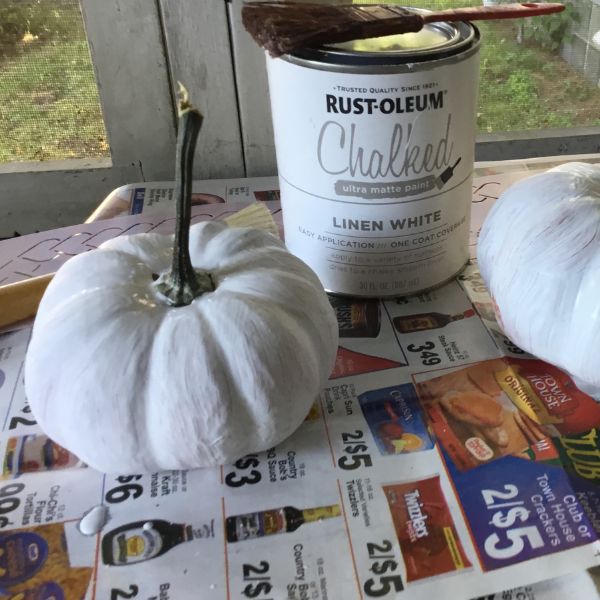
Paint the bottom and about a third of the way up your pumpkin and turn it upside down and let it dry. Then paint the rest, overlapping and blending with the previously painted part.
Let dry completely. If any of the original colors of the pumpkin show thru, add a second coat of paint.

Cut out design. I used one on each segment.
Place the image face up and coat with Mod Podge.
this should be thick enough that the image is obscured.
Place coated side of the image onto the pumpkin and press firmly, Carefully wipe away any excess that oozes out. Repeat around the pumpkin.
Dry for 24 hours.

Wet the image with a damp sponge. Lightly rub to remove the paper backing. Don't rub too hard, you'll remove the image as well.
Let dry and repeat for any area that has paper remaining.
Use a clear coat sealer over the entire pumpkin and let it dry.
Your very own Barn Quilt Pumpkin is ready to use!

"There are no rules in quilting, and if you think there are, then it is time you try breaking a few."
-Dana Bolyard
-To use stencil, right-click, save image as, to download. Then print on plain paper.
No comments:
Post a Comment